
Mounting a radiant heater to your ceiling is one of the most effective ways to maximize heating performance while maintaining a clean, functional space. Whether you are installing a heater in a restaurant patio, garage, warehouse, workshop, or covered outdoor living area, proper mounting ensures your system delivers reliable warmth exactly where it is needed.
Radiant heaters are designed to distribute heat efficiently by warming people and surfaces directly rather than heating the surrounding air. Because of this, positioning and installation play a crucial role in achieving optimal results. Mounting the heater overhead allows radiant heat to spread evenly across the intended space while keeping the heater safely out of the way.
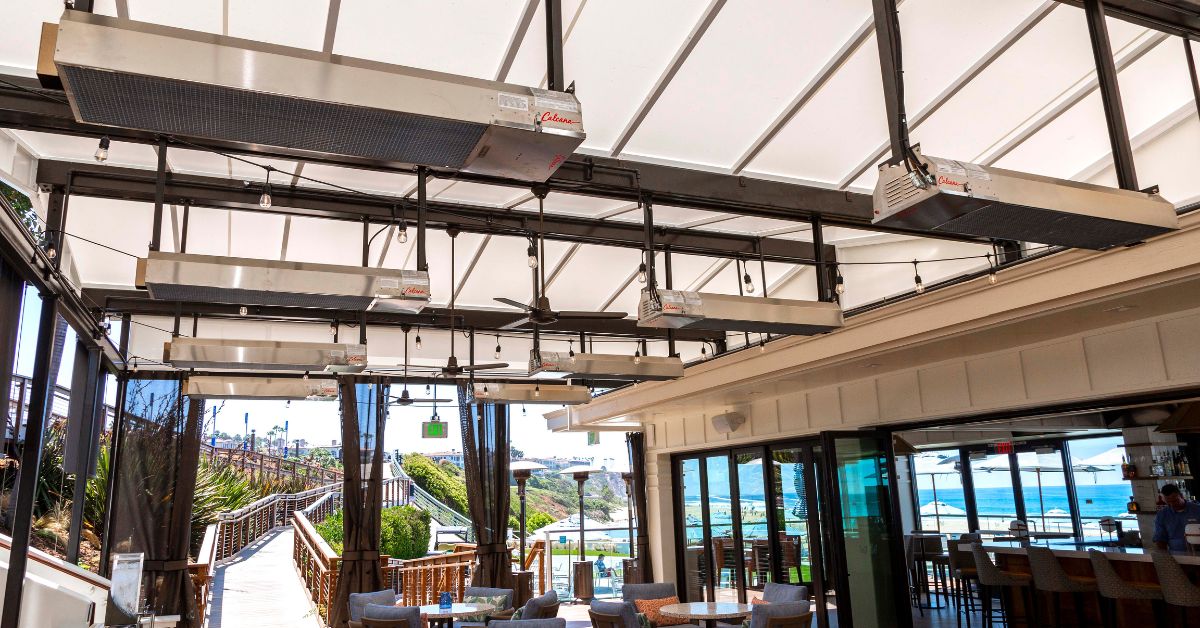
Ceiling-mounted radiant heaters also help free up valuable wall and floor space. In commercial environments such as restaurants, bars, and hospitality venues, this is especially important. Maintaining an uncluttered space improves both aesthetics and safety while allowing guests and staff to move freely without obstacles.
However, installing a radiant heater on a ceiling requires careful planning and attention to detail. From choosing the correct mounting hardware to ensuring proper clearance and alignment, each step plays an important role in the long-term safety and performance of the system.
With the right tools, preparation, and a clear step-by-step approach, mounting your radiant heater can be a straightforward process. This guide will walk you through nine important tips to help you safely and efficiently mount a radiant heater to virtually any ceiling type while maximizing comfort, safety, and heating efficiency.
Checking the Ceiling or Wall Material Before Installing Your Radiant Heater
One of the first and most important steps when mounting a radiant heater is identifying the type of ceiling material you will be working with. Different materials require different mounting techniques, hardware, and safety considerations.
Understanding the structure and composition of your ceiling ensures that your heater will be installed securely and safely.
Ceilings made from combustible materials, such as wood, plywood, or certain plastics, require extra caution. These materials can potentially be affected by prolonged exposure to heat if the heater is mounted too closely. For this reason, most heater manufacturers specify minimum clearance distances between the heater and nearby surfaces.
Following these clearance guidelines helps prevent overheating and reduces the risk of fire hazards.
In contrast, non-combustible materials, such as concrete, steel, or masonry, are more resistant to heat and often allow greater flexibility when mounting radiant heaters. These materials typically provide stronger structural support as well.
Drywall ceilings are another common installation surface. While drywall itself cannot support significant weight, it is usually attached to wooden joists or metal framing above. In these cases, it is essential to anchor the heater mounting hardware directly into the structural supports behind the drywall.
Depending on the material, you may need specific hardware such as:
-
Wood screws for wooden beams or joists
-
Masonry anchors for concrete ceilings
-
Toggle bolts for drywall applications
-
Structural lag bolts for heavy-duty mounting
Taking the time to properly evaluate your ceiling material before beginning installation will help prevent complications later and ensure a stable and safe mounting system for your radiant heater.
Follow Heater Manufacturer Guidelines
Every radiant heater model is designed with specific installation requirements, which is why reviewing the manufacturer’s guidelines is an essential step before beginning the mounting process.
Installation manuals provide detailed instructions that ensure the heater operates safely and efficiently. Skipping this step can lead to improper installation, reduced performance, or potential safety risks.
Most manufacturer guidelines include important details such as:
-
Recommended mounting height
-
Minimum clearance distances
-
Proper mounting hardware
-
Installation angles
-
Gas or electrical connection requirements
These guidelines are developed through extensive testing and engineering to ensure the heater performs as intended.
For example, mounting height can have a significant impact on heating efficiency. If a heater is mounted too high, the radiant heat may disperse before reaching the intended area. If it is mounted too low, the heat could become concentrated in a small space or create uncomfortable hot spots.
Manufacturers also provide guidance on safe distances from walls, ceilings, and other nearby surfaces. These clearances are critical for preventing overheating and ensuring proper airflow around the heater.
Following the installation instructions step by step ensures that the heater operates safely while delivering the best possible heating performance.
If you ever have questions during installation, contacting the manufacturer or authorized dealer can provide additional guidance and peace of mind.
Ensure Proper Clearance
Maintaining proper clearance around your radiant heater is one of the most important factors in ensuring both safety and performance.
Radiant heaters produce significant heat output, which means nearby surfaces and objects must be positioned at a safe distance. Adequate clearance prevents heat buildup and allows the heater to operate efficiently.
Most manufacturers provide specific clearance requirements that include:
-
Minimum distance from the ceiling
-
Distance from nearby walls
-
Clearance from combustible materials
-
Distance from furniture or decorations
Following these guidelines ensures that the heater can safely radiate heat without creating hazards.
Proper clearance also improves heat distribution. When a heater has sufficient space around it, radiant heat can spread evenly across the intended area. This creates a more comfortable environment and prevents uneven heating patterns.
Another important factor to consider is airflow. While radiant heaters primarily warm surfaces directly, proper airflow still helps regulate temperature and maintain safe operating conditions.
Avoid placing objects such as umbrellas, plants, decorations, or lighting fixtures directly in the heater’s path. Obstructions can block heat and reduce the effectiveness of the system.
By carefully planning the layout and ensuring adequate spacing around the heater, you can maximize both comfort and safety.
Use a Stud Finder for Secure Installation
One of the most important steps when mounting a radiant heater is securing the unit to a strong structural support. This is where a stud finder becomes an invaluable tool.
A stud finder helps locate the wooden or metal framing behind ceilings and walls. These structural elements provide the strength needed to support the weight of the heater and mounting hardware.
Installing a heater directly into drywall without securing it to a stud can result in instability or even failure over time. Radiant heaters must be mounted securely to prevent accidents and ensure long-term reliability.
Once you locate the studs or joists in your ceiling, mark their position with a pencil or tape. These marks will guide the placement of mounting brackets and hardware.
Using a level during this process is also important. Ensuring that the heater is mounted evenly helps distribute heat properly and prevents unnecessary strain on the mounting system.
Taking the time to properly locate and secure mounting points not only improves safety but also contributes to a professional-looking installation.
Install the Mounting Bracket First
The mounting bracket serves as the foundation for your radiant heater installation. Installing it correctly is essential for ensuring stability and long-term performance.
Begin by aligning the bracket with the marks you made for the ceiling studs or joists. This ensures that the weight of the heater will be supported by the structural framework rather than the ceiling surface alone.
Using the appropriate drill and hardware, attach the bracket securely to the ceiling. Depending on the heater model and ceiling material, this may involve lag bolts, screws, or anchors.
It is important to tighten the hardware firmly without overtightening, which could damage the bracket or mounting surface.
Many radiant heater mounting brackets are designed with adjustable slots or pivot points. These allow installers to fine-tune the angle of the heater for optimal heat distribution.
Once the bracket is securely installed, double-check that it is level and properly aligned before attaching the heater.
A well-installed bracket ensures that the heater remains stable, evenly supported, and correctly positioned.
Tips for Chain Mounting
Chain mounting is a popular installation method for radiant heaters, especially in spaces with high ceilings or exposed structural beams. However, chain mounting is not recommended in locations affected by wind.
This approach allows the heater to be suspended at the ideal height while maintaining flexibility in positioning.
When using chain mounting, always select heavy-duty chains that are rated to support the weight of the heater. Using high-quality hardware ensures long-term durability and safety.
Mounting points should always be attached to strong structural elements such as beams, joists, or steel supports. Avoid attaching chains to surfaces that are not designed to carry weight.
Adjusting the chain length allows you to position the heater at the optimal height for heat distribution. A level can help ensure the heater hangs evenly.
Another advantage of chain mounting is that it allows installers to maintain proper clearance from the ceiling while still directing heat toward the desired area.
Chain mounting is commonly used in environments such as:
-
Restaurants and patios
-
Warehouses
-
Workshops
-
Garages
-
Industrial facilities
This method provides flexibility while maintaining safe and effective heater placement.
Tips for Rigid Mounting
Rigid mounting is another common method used when installing radiant heaters, particularly in commercial or permanent installations.
This approach involves securing the heater directly to the ceiling using a solid mounting bracket rather than chains.
Rigid mounting offers several advantages, including increased stability and a cleaner visual appearance. Because the heater is fixed in place, it remains securely positioned even in environments where vibration or movement may occur.
When choosing rigid mounting hardware, always ensure it is compatible with the heater’s weight and specifications.
The mounting surface must also be strong enough to support the load. Structural beams, joists, or reinforced ceiling supports are ideal for rigid mounting installations.
Proper installation ensures that the heater remains securely in place while delivering consistent radiant heat to the target area.
Rigid mounting is often preferred in:
-
Restaurants and hospitality venues
-
Covered patios
-
Commercial outdoor spaces
-
Residential patio installations
Because of its stability and durability, rigid mounting is one of the most reliable installation methods for radiant heaters.
Check the Angle & Positioning
Correct positioning plays a major role in the performance of a radiant heater.
Unlike traditional heating systems that rely on circulating warm air, radiant heaters direct heat in a specific direction. The angle of the heater ensures that warmth is delivered to the areas where people gather.
Most radiant heaters are installed with a slight downward tilt. This allows the heat to radiate toward seating areas, workspaces, or gathering spots rather than dispersing upward.
However, the angle should never be too steep. Excessive tilt can create uneven heating patterns and reduce the effective coverage area.
When positioning your heater, consider factors such as:
-
Seating arrangements
-
Table locations
-
Walkways and traffic flow
-
Ceiling height
-
Overall room layout
Proper positioning ensures that radiant heat reaches the intended area efficiently while maintaining comfortable conditions throughout the space.
It is also a good idea to periodically reassess the heater’s positioning if the layout of the space changes.
Plan for Long-Term Maintenance & Accessibility
While installation is the primary focus, it is also important to consider future maintenance and accessibility when mounting a radiant heater.
Even high-quality heaters require occasional inspection, cleaning, and servicing to maintain optimal performance.
Mounting the heater in a location that allows easy access can make routine maintenance much easier. Technicians should be able to safely reach the heater without dismantling surrounding structures.
Keeping the heater free from dust, debris, and obstructions will help maintain consistent heating performance.
Periodic checks should include:
-
Inspecting mounting hardware
-
Checking gas or electrical connections
-
Cleaning reflectors and heating elements
-
Ensuring proper clearance is maintained
Planning for maintenance during installation helps extend the lifespan of the heater and ensures reliable operation for years to come.
Mount Your Radiant Heater with Confidence
Mounting a radiant heater to your ceiling is one of the most effective ways to create a warm and comfortable environment while maximizing space and efficiency. With the right preparation, tools, and installation techniques, you can safely mount your heater and enjoy reliable radiant heat throughout your space.
From evaluating ceiling materials to ensuring proper clearance and selecting the right mounting method, each step contributes to a secure and effective installation.
At Calcana, we’re committed to making the installation process as simple and straightforward as possible. Our infrared heaters are designed with performance, durability, and ease of installation in mind.
We also offer infrared heater mounting kits that remove the guesswork from ceiling installations. These kits include the hardware and accessories needed to securely mount your heater while maintaining proper alignment and clearance.
Combined with our easy-to-follow installation manuals and knowledgeable customer support team, you can feel confident that your radiant heater will be installed safely and correctly.
Whether you’re heating a restaurant patio, commercial workspace, or outdoor living area, the right mounting setup ensures you get the most out of your radiant heating system.

Leave a comment
This site is protected by hCaptcha and the hCaptcha Privacy Policy and Terms of Service apply.